Showing posts with label Instruction. Show all posts

Tuesday, August 3, 2010

Trying New Things

I think it's SOOOO important - both in life and in profession - that in order to grow, we have to try new things!  That's why I love following other blogs that share tutorials for different styles and techniques for jewelry design and beading.  It allows me to play which = peace and serenity AND who knows when that new technique will become a critical "WOW" in a new piece!

So today, I want to share with you one of my favorite blogs for learning new things!  Mortira over at Inspirational Beading is often sharing different styles of beading.  Over the weekend I saw her tutorial for the double spiral rope for making bracelets and necklaces.  I LOVE IT!  If you remember, earlier this year I was thrilled to learn how to create a simple spiral rope with seed beads.  But now, a DOUBLE spiral.... is that like bliss for this curly girl?  LOL

If it's sparked your curiousity, head over here --> to Mortira's Inspirational Beading and check out her great tutorial.  What I love about Mortira's tutorials are her AWESOME how-to photos.  She makes it so easy to she exactly what goes where. 

Thanks Mortira for sharing your beady knowledge with so many people.  Your work is amazing and you are an inspirational teacher!

Sunday, June 13, 2010

Book Giveaway!

I wanted to share with you about a new giveaway from a dear friend of mine!  Lisa Crone the author of A Bead A Day is giving away a copy of her incredible book, A Bead in Time

I purchased Lisa's book about a year ago.  What I loved about it is that she offers great illustrations with her written instructions.  So regardless of your skill level, anybody can follow her tutorials and create beautiful jewelry!

Here's how you can win - head over to Lisa's blog (click here) and leave a comment on her post.  I personally, would love for YOU to win.  I've gained TONS... seriously, tons of inspiration from this book.  Lisa shares with you her inspiration behind each project and it gets your creative juices flowing beyond what you might have imagined before.

If you're impatient Irish like me, you'll want your copy whether you win or not.  So you can purchase it directly from Amazon below.  Good luck and may your inspiration flow! :)

Saturday, June 5, 2010

Spiral Stitch Beaded Rope Project

This week I tried something I have never done before... I went where my beads have never taken me... I traveled to the land of BEAD WEAVING!  I know, now you're thinking... "Oh geez Dawn, yet another obsession..." and you just might be right.  But how cool is it to be able to create chunky beaded chains like the spiral rope chain to hang beautious chunky pendants on? 

I have seen the spiral rope chain created by very, Very talented beaders on their blogs and in their Etsy & Artfire Stores.  I love the look of it, and I've wanted to try it, but had no clue where to start...

In steps my MIL.  She happened to see the Best of Step By Step Beads Magazine at JoAnn's when she was picking up her flags for Memorial Day.  She flipped through and saw the bead weaving and equated it to the wire crochet that I love so much.  So she picked it up and the love of seed beads continues from there...

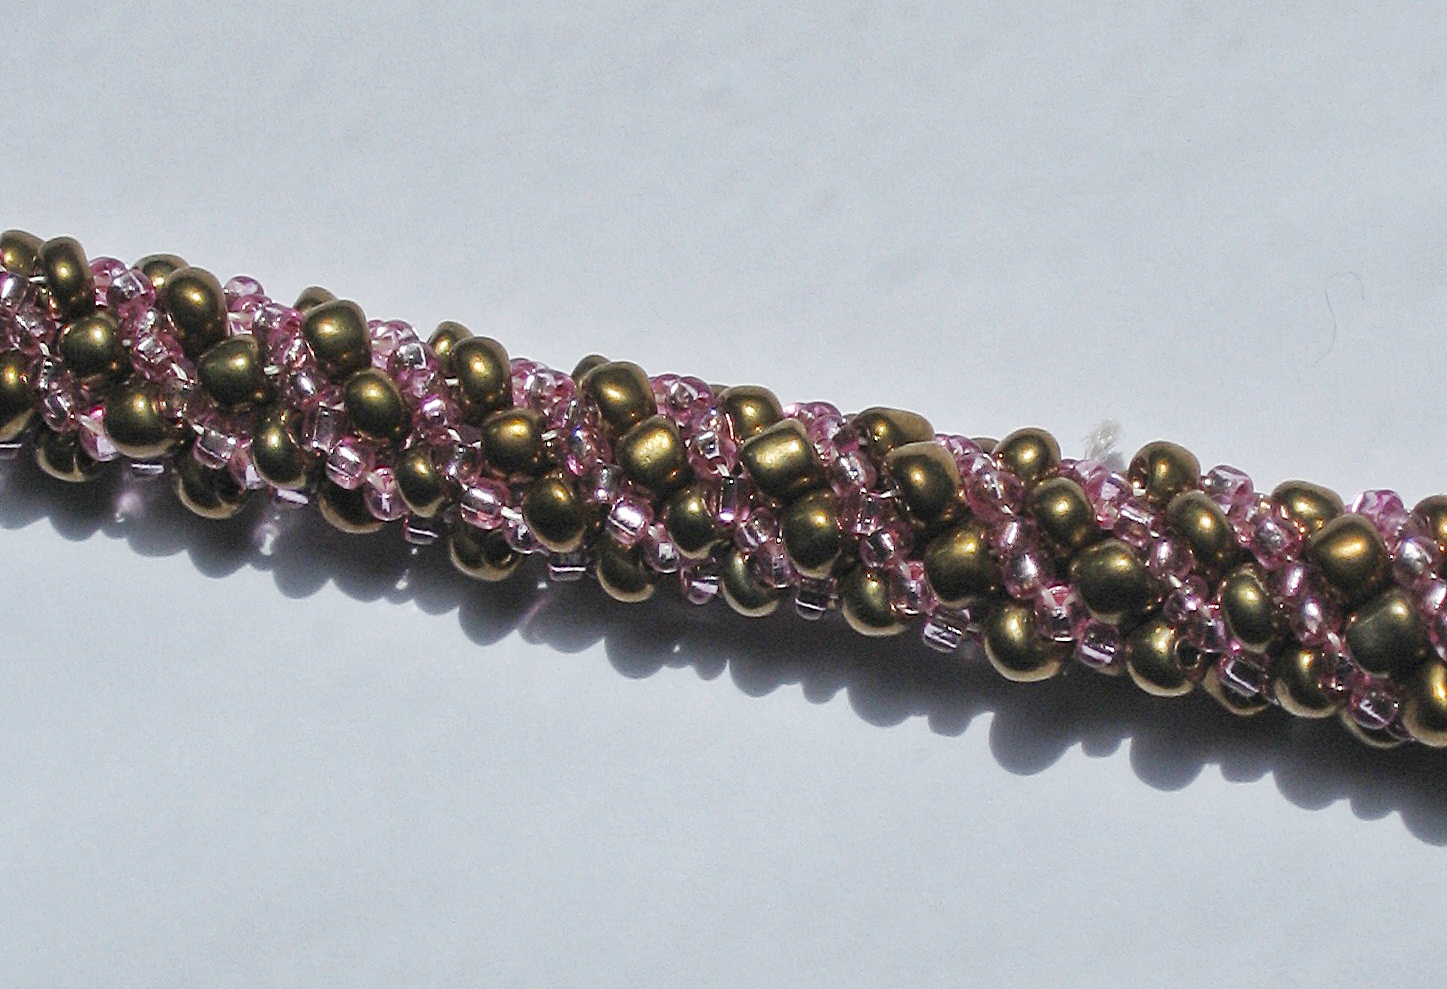
So over the last week I couldn't wait to get my hands into some thread and itty bitty beads.  I created this pink and chocolate spiral rope chain, which I'm going to put some cone ends on w/ a clasp and call it mine forever because it was my first-born bead weaving project.  :) 

I also created a crystal necklace using some seed beads and 6 mm crystals.  It too turned out sparkley and beautiful and will go in my jewelry box as a treasure forever.  :)    I love trying new things, it opens the mind, expands the creativity and challenges us to create something new. 

If you're looking to break through a plateau, I encourage you to pick up a book, magazine or online tutorial about something you haven't done before.  Challenge yourself to complete it and see what you can learn!

Have yourself a wonderful weekend!  On Monday, I'll be sharing with you all about a new Sponsor we have for our Blogmania Giveaway!  You'll just love her - promise! :)

{Hugs!}
Dawn

Sunday, May 16, 2010

Sunday Sharing - Create your own Grab Button

I want to thank Tara over at The Waterwaif for teaching me how to create my own grab button.  While I've been grabbing other people's buttons for years... LOL... I never knew how EASY it was to make one for myself so other wonderful websites and blogs could link back to mine.  We'll I'm here to tell you, it's a piece of cake... an in my case, raspberry coffee cake with coffee 'cuz that's what I"m all about while I write this post! :)  So thank you Tara for being a great teacher and sharing your knowledge!  Please stop over an pay her a visit at her blog.  She also makes beautiful, custom crafted jewelry and really is a great inspiration to work at home moms!

This is a great way to reciprocate traffic among blog friends and be able to share the blogger love!  Any website or blog can grab your button and advertise for you, regardless of if it's a blogger, wordpress or typepad account.  These instructions to create a grab button however are written for people using blogger as their blogging platform, because that's what I did mine in, so that's what I learned! :)  Feel free to grab my button over on the right!  I appreciate sharing the love!  You are also welcome to post links to your blog, website or online store over on my Facebook Fan Page for Designs By Dawn Marie.  I have a discussion tab that has a "Link Love" discussion started and it's for anybody that wants to share their website URL with other Facebookers.  So you're welcome to share there as well!

How to make your own Grab Button.
1. First, make sure you have an ad or a button. The easiest way to do this, as I did, is to take a photo of one of your products and add your name or link to it with photoshop or a similar program. Personally, I use Photoscape as it's a free photo editing software that can be downloaded online.  It works great and it's really easy to use.  It's best to keep the image size under 200 pixels wide so it will fit in most sidebars.


2. Upload your new ad to any hosting site. Many people use http://photobucket.com because it is free, but there are a lot of options out there for web hosting.  I have a hosting account with Bluehost for multiple websites that my fiance and I run.  So I just uploaded my jpg ad to that account.


3. Now, open a new tab or window and go to your blog. This tutorial is designed for Blogger blogs as that is how I learned it.  I'm sure it's similar on other platforms, the names of the tabs and commands may be slightly different. Log into your blog, click "customize", then "Layout", then "Page Elements". Select "Add a gadget" and then choose 'HTML/Javascript'.


4. Copy and paste the following in the text area:
------------------------------------------------------ 
 <img src="http://YOURADURLHERE.jpg" /> <br /> <textarea style="text-align:center" rows="5" cols="20"><a border="0" href="http://YOURBLOGURLHERE.com" target="_blank"><img src="http://YOURADURLHERE.jpg"></a></ textarea>
-------------------------------------------------------
5. Keep that window open and go to Photobucket, or  whichever photo hosting you are using, and copy the direct link URL for  your ad. Then come back to your blog window and paste that URL in both  places where I've written YOURADURLHERE. Make sure you leave the  quotation marks as that's what keeps a link active in HTML.

6. Then, see where I've written YOURBLOGURLHERE? This is the website you want anybody that clicks on your button to go to. So whether it's your  blog's URL, or your Artfire shop or Etsy store, or whichever site you want to link to.  Put that web address in that spot.

7. Make sure you save. Once it's saved, you should be able to bring up your blog and you'll see the image of your button with the code underneath that people can copy and paste on their sites to link back to you.

Hope this helps! For me it as like an "AH HAAAAAAAAAA" moment!  Thanks again Tara for sharing with me and reciprocating links! Hope your Sunday is absolutely superb!

{Hugs!}

LinkWithin

Related Posts with Thumbnails